
A basic wired ribbon bow is one of the most useful bow-making skills to learn. Once you understand how to hold the ribbon, twist it, build your loops, and secure the center, you can use the same basic technique for wreaths, lanterns, signs, gift baskets, door hangers, seasonal décor, and more.
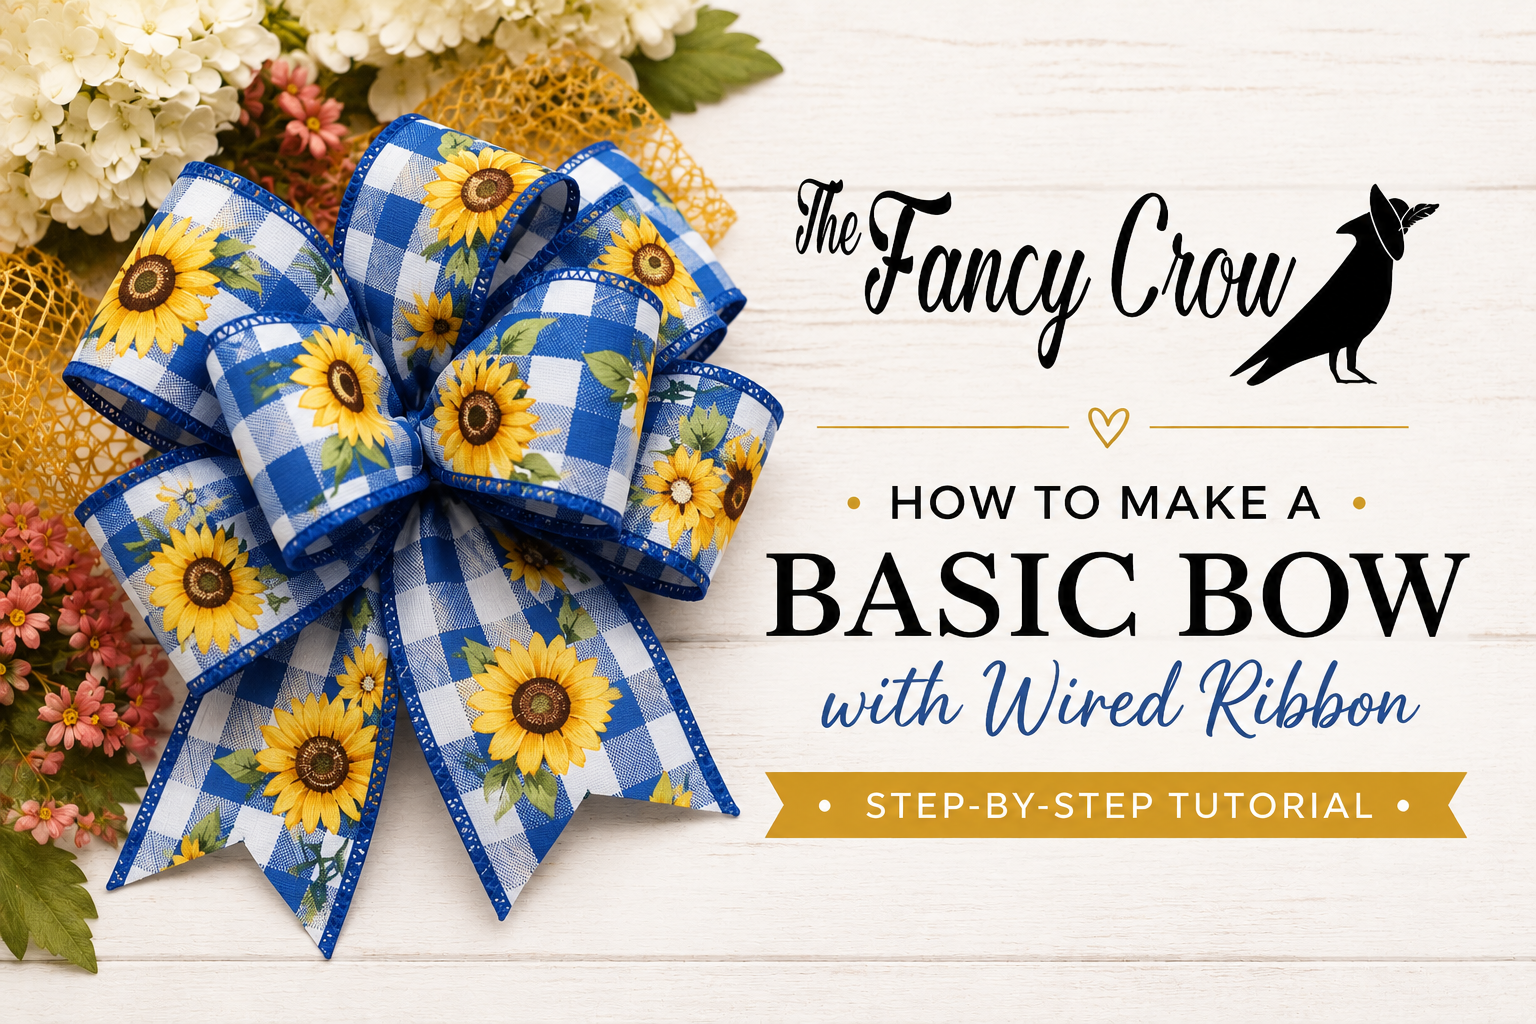
In this tutorial, I am making a basic 9″ bow with 11 loops using a quality 2.5″ wired ribbon. The ribbon shown has a sunflower design on a blue and white buffalo check background with a blue overstitched edge. It is a pretty everyday-to-seasonal ribbon that works beautifully for late summer, fall, farmhouse décor, wreath making, and gift accents.
Watch How to Make a Basic Bow with Wired Ribbon
Supplies Used
Details
Tools Used
Bow-Making Tips from the Video
When beginning your bow, the end of the ribbon should be half the diameter of the finished bow or less unless it is one of your tails. In this video, it was not one of the tails. I began with the top layer in this video. Measure the length from the end of the ribbon to the center of your bow, which is half the diameter of the top layer. Pinch or accordion fold your ribbon to bring the wired edges together with the least amount of bulk. From that fold
Creating the top center loop: The center loop can be the same length or smaller than the top layer of loops. In this video, it is slightly smaller.
Ways to Use This Easy Bow
Shop
Ready to make your own bow?
Shop wired ribbon at The Fancy Crow. We carry ribbon for wreath makers, bow makers, decorators, and creative makers across the U.S.
thefancycrow.com/ribbon